


READY TO WEAR
SELECT SIZE
Choose a size from our current ready-to-wear stock and then continue with the checkout.
 CUSTOM MADE
BODY MEASUREMENTS
Choose this option to provide us with your body measurements and your fit preference. Our tailors will then custom make the suit to fit you accordingly.
SUIT MEASUREMENTS
Choose this option if you want a custom made suit and you want to enter the suit measurements.
Need help?
Chat with us or Schedule a call
REGULAR (between 168 - 187 cm)
LONG (taller than 187 cm)
YOUR BODY MEASUREMENTS
Give us your body measurements & fit preference and let our skilful tailors do the rest of the work.

To measure the shoulder width correctly, we highly recommend that you put on a t-shirt. Make sure the shoulder seams (see picture) are positioned where you would like the jacket's shoulders to be positioned. Then measure from the left shoulder seam to the right shoulder seam. Also, please note that the measuring tape should do a small "curve" and follow the natural shape of your shoulders.

Measure around the thickest part of the chest and back (typically right under the armpits and across the nipples) keeping the measuring tape straight. Breath normally. It is important that the measuring tape is straight. It should be held firm to the skin, but not tight (you should be able to fit a finger between the measuring tape).

Measure around the thinnest part of the stomach/upper waist. Keep the tape straight and firm to the skin, but breathe in and out a few times to ensure this is at a comfortable width. However - if you have a bit of a rounder belly - then measure the widest point of your belly.

Put on a business shirt or t-shirt, and stand with your arms in a relaxed position. Find the spot on the shoulder where all the stitching meet (like in the picture above). This point should in the same position as when you measured the shoulder width. Then measure from that point all the way down to your wrist bone. Make sure the measurement tape follows the shape of the arm slightly. Then add +1cm/0.4in if you prefer your shirt cuff to be visible, or add +2cm/0.8in if you prefer slightly longer jacket sleeves.
ADVANCED SIZE OPTIONS

Measure around the base (thickest part) of your neck. It is important that you measure at the lowest/thickest part of your neck.

Measure the circumference of your bicep muscle (thickest point). Usually, the thickets point is quite close to the armpit.

Measure the thickets point of your forearm. Usually, this point is located slightly below your elbow.

Measure the circumference of your waist (where you want your trousers to be fitting around your waist). Note: our trousers are usually a bit more high waisted and therefore we recommend that you measure slightly higher than you would with normal pants.

Measure the circumference around your hip and seat area. Make sure you measure around the thickest point.

1) This measurement is actually easiest measured by taking a pair of trousers that you like in terms of length. Pick a pair of trousers that like in their length and lay them flat.

2) Fold the top leg above the waistband, exposing the crotch seams. Use your hands to gently extend and flatten the fabric.

3) Measure from the crotch seam downward to the end the trousers.
ADVANCED SIZE OPTIONS
JACKET FIT
WAIST LINE
-
If you prefer the jacket to be tight around your waist, pick Slim fit. Otherwise, if you prefer a slightly looser fit around you waist, then pick the Regular fit.
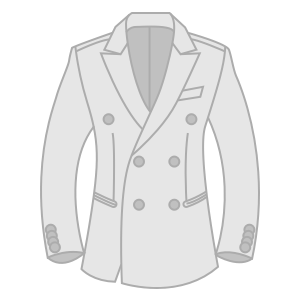
Regular
-
If you prefer the jacket to be tight around your waist, pick Slim fit. Otherwise, if you prefer a slightly looser fit around you waist, then pick the Regular fit.
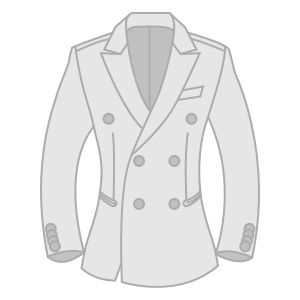
Slim
TROUSERS FIT
RISE
-
This refers to where the trousers' waistline is positioned on your body. If you prefer a high-waisted fit, then choose High rise. If you wish the rise to be neither low nor high, then choose Medium rise. Lastly, if you want the trousers to be seated low, then pick Low rise.
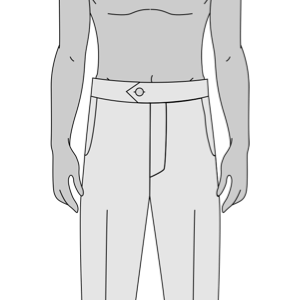
High
-
This refers to where the trousers' waistline is positioned on your body. If you prefer a high-waisted fit, then choose High rise. If you wish the rise to be neither low nor high, then choose Medium rise. Lastly, if you want the trousers to be seated low, then pick Low rise.
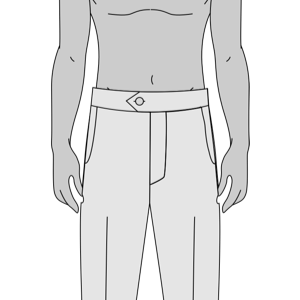
Medium
-
This refers to where the trousers' waistline is positioned on your body. If you prefer a high-waisted fit, then choose High rise. If you wish the rise to be neither low nor high, then choose Medium rise. Lastly, if you want the trousers to be seated low, then pick Low rise.
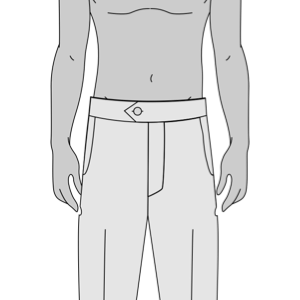
Low
SHAPE
-
Straight cut: Trousers are straight meaning that trousers have similar width around the thighs, calves and leg opening.
Tapered cut: Trousers become tighter/more narrow in the leg opening.
Boot cut: Trousers become much wider in the leg opening compared to the thigh.
Wide cut: Trousers are wide in both thigh and leg opening - creating a straight cut - yet with a wider fit.
Extra Slim cut: Trousers are extra slim around the thighs, calves and leg opening.
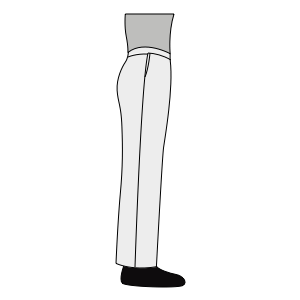
Straight cut
-
Straight cut: Trousers are straight meaning that trousers have similar width around the thighs, calves and leg opening.
Tapered cut: Trousers become tighter/more narrow in the leg opening.
Boot cut: Trousers become much wider in the leg opening compared to the thigh.
Wide cut: Trousers are wide in both thigh and leg opening - creating a straight cut - yet with a wider fit.
Extra Slim cut: Trousers are extra slim around the thighs, calves and leg opening.
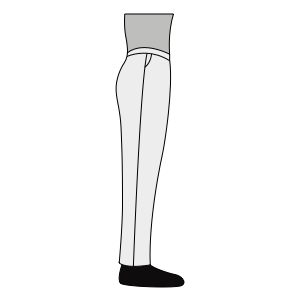
Tapered cut
-
Straight cut: Trousers are straight meaning that trousers have similar width around the thighs, calves and leg opening.
Tapered cut: Trousers become tighter/more narrow in the leg opening.
Boot cut: Trousers become much wider in the leg opening compared to the thigh.
Wide cut: Trousers are wide in both thigh and leg opening - creating a straight cut - yet with a wider fit.
Extra Slim cut: Trousers are extra slim around the thighs, calves and leg opening.
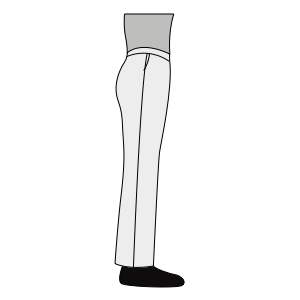
Boot cut
-
Straight cut: Trousers are straight meaning that trousers have similar width around the thighs, calves and leg opening.
Tapered cut: Trousers become tighter/more narrow in the leg opening.
Boot cut: Trousers become much wider in the leg opening compared to the thigh.
Wide cut: Trousers are wide in both thigh and leg opening - creating a straight cut - yet with a wider fit.
Extra Slim cut: Trousers are extra slim around the thighs, calves and leg opening.
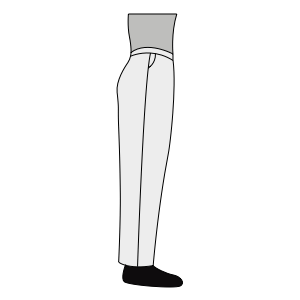
Wide cut
-
Straight cut: Trousers are straight meaning that trousers have similar width around the thighs, calves and leg opening.
Tapered cut: Trousers become tighter/more narrow in the leg opening.
Boot cut: Trousers become much wider in the leg opening compared to the thigh.
Wide cut: Trousers are wide in both thigh and leg opening - creating a straight cut - yet with a wider fit.
Extra Slim cut: Trousers are extra slim around the thighs, calves and leg opening.
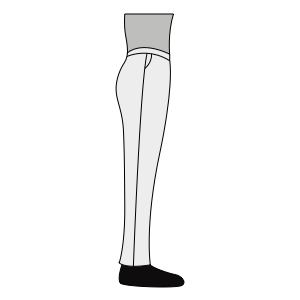
Extra Slim cut
Length
-
No break: Trousers cut-off just above the shoes.
Half break: Trousers slightly touches the shoes.
Full break: Trousers rest on the shoes.
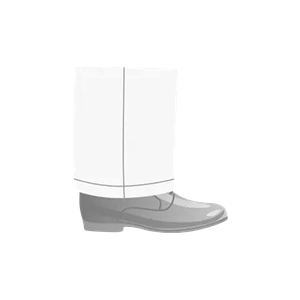
No Break
-
No break: Trousers cut-off just above the shoes.
Half break: Trousers slightly touches the shoes.
Full break: Trousers rest on the shoes.
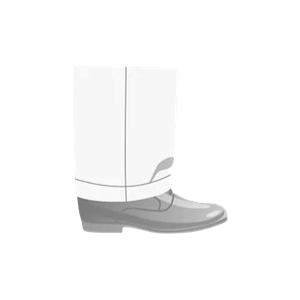
Half Break
-
No break: Trousers cut-off just above the shoes.
Half break: Trousers slightly touches the shoes.
Full break: Trousers rest on the shoes.
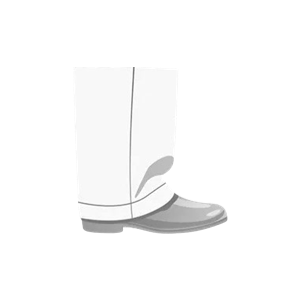
Full Break
Anything else we should know about your body or fit preference?
Jacket

Step 1: Button the jacket and lay it flat on a table face down with the collar down and arms positioned downward. Use your hands to gently extend and flatten out excess fabric.

Step 2: Begin on the left side, where the top of the armhole seam meets the shoulder fold, and measure across.

Step 1: Button the jacket and lay it flat on a table face down with the collar up and arms positioned upward. Use your hands to gently extend and flatten out excess fabric.

Step 2: Starting at the lowermost point of the left armhole, measure across to the same point on the right.
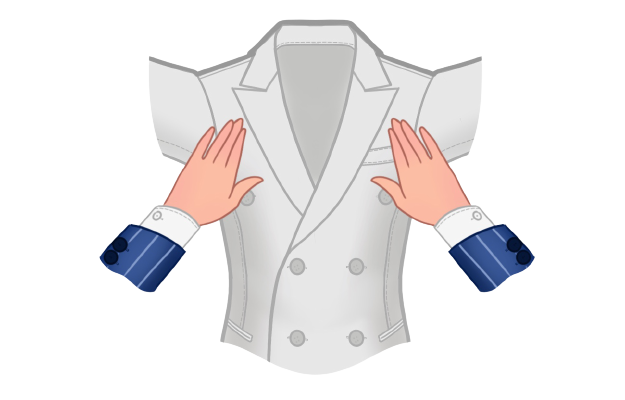
Step 1: Button the jacket and lay it flat on a table face down with the collar up and arms positioned upward.
Use your hands to gently extend and flatten out excess fabric.

Step 2: Starting from the jacket's left edge, measure across at the midway point just below the first button.

Step 1: Button the jacket and lay it flat on a table face down with the collar down and arms positioned downward. Use your hands to gently extend and flatten out excess fabric. Step 2: Beginning at the center of the collar base (where the jacket’s back seam meets the collar) measure to the bottom hemline.

Step 1: Button the jacket and lay it flat on a table with the collar up and position the arm in a natural position. Use your hands to gently extend and flatten out excess fabric.

Step 2: Beginning at the top of the armhole seam (at the middle point of the shoulder) measure straight down through the middle of the sleeve to the sleeve edge.

Step 1: Button the jacket and lay it flat on a table with the collar up and position the arm in a natural position. Use your hands to gently extend and flatten out excess fabric.

Step 2: Beginning at the top of the armhole seam (at the middle point of the shoulder) measure straight down through the middle of the sleeve to the sleeve edge.
ADVANCED SIZE OPTIONS

1) Lay the completely buttoned & zipped trouser flat on a table face up, use your hands to gently extend and flatten out the fabric.

2) Measure from the lower point the left pocket (point 1), then to the end of the zipper (point 2), and then to lower point of the right pocket (point 3).

Step 1: Button the jacket and lay it flat on a table with the collar up and position the arm in a natural position. Use your hands to gently extend and flatten out excess fabric.

Step 2: Starting at the highest point of the jacket, where the collar meets the shoulder seam, measure all the way down to the edge of the jacket.
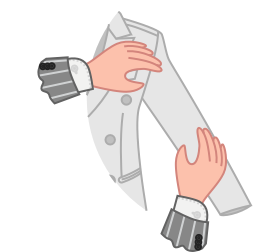
Step 1: Lay the completely buttoned jacket flat on a table facing up with the collar up, and the arms positioned to the side. Use your hands to gently extend and flatten out excess fabric.

Step 2: Beginning at the edge of the armhole seam (at the armpit point) measure horizontality the distance between this point and the edge of the sleeve.
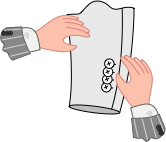
Step 1: Lay the buttoned cuff facing up. Use your hands to gently extend and flatten out excess fabric.

Step 2: Begin on the left at the widest point (sleeve side), to the same point on the other side using the cuff edge as a guide.


Back leaning posture: A posture is considered backward leaning if the shoulder stance tilts backwards compared with the rest of the torso, causing the back of the jacket to be longer than the front. This alteration will increase the length of the jacket in the front and shorten the length of the jacket in the back to balance the hemline.

Forward leaning posture: A posture is considered forward leaning if the shoulder stance tilts forward compared with the rest of the torso, causing the front of the jacket to be longer than the back. This alteration will increase the jacket's length in the back and shorten it in the front to balance the hemline.

Back leaning posture: A posture is considered backward leaning if the shoulder stance tilts backwards compared with the rest of the torso, causing the back of the jacket to be longer than the front. This alteration will increase the length of the jacket in the front and shorten the length of the jacket in the back to balance the hemline.

Forward leaning posture: A posture is considered forward leaning if the shoulder stance tilts forward compared with the rest of the torso, causing the front of the jacket to be longer than the back. This alteration will increase the jacket's length in the back and shorten it in the front to balance the hemline.
Trousers

1) Lay the completely buttoned & zipped trouser flat on a table face up, use your hands to gently extend and flatten out the fabric.

2) Begin by measuring from the edge of the waistband, down to the 1cm/0.5in point. Make note of this point.

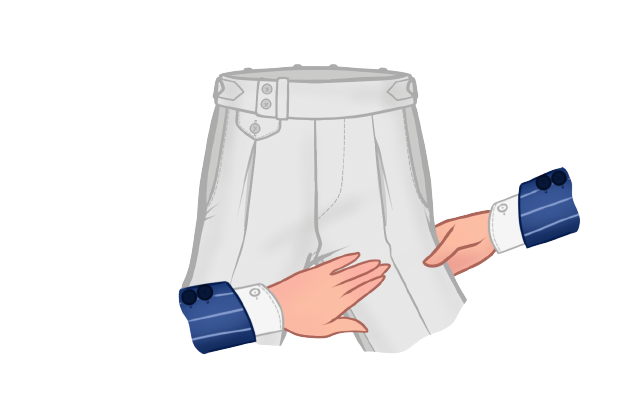 1) Lay the completely buttoned & zipped trouser flat on a table facing up and slightly spread the legs to expose the inseams. Use your hands to gently extend and flatten out the fabric.

2) Begin by measuring from the crotch downward along the right inseam to the 8cm/3in point.
Make note of this point.

3) Measure across.

Step 1: Lay the trousers on a flat surface.


Step 3: Begin from the crotch seam, and measure down 45 cm/17 in point. Make a note of this point.

Step 4: Beginning at the left edge of the pant leg, measure across at the previously marked 45cm/17in point. Be sure to avoid any slack on the measuring tape.


2) Fold the top leg above the waistband, exposing the crotch seams. Use your hands to gently extend and flatten the fabric.

3) Begin where the left and right inseams meet, measure downward along inseam to the edge of the hem.


ADVANCED SIZE OPTIONS

1) Lay the completely buttoned & zipped trouser flat on a table face up, use your hands to gently extend and flatten out the fabric.

2) Measure from the lower point the left pocket (point 1), then to the end of the zipper (point 2), and then to lower point of the right pocket (point 3).


